


I made this. It's the Death Star Trench from Rogue One.
The reason we’re listening to him is because he’s giving a talk and demonstration on how 3D model making can now be created in VR, how the models made are so accurate in terms of scale that they can act as plans for set builders, how the process is so quick and simple that the models can also be dropped into concept art (and easily modified) plus how all of this can be done on an ultra-portable laptop(!) – in this case an MSI P65 Creators Edition which is essentially a tweaked gaming laptop.
Colie says that simply by plugging in an Oculus Rift system with Touch controllers, plus a Wacom tablet the laptop can power everything. If he adds the elaborate WACOM Cintiq 22HD to the mix he’d need to add a powered USB hub to the mix, but ultimately that's all.
|
|


First he took a picture from MSI’s company office windows using an iPhone. He said that if he required a fully-rendered 3D background he’d use Maya but, for now, simply importing the picture to Photoshop and painting over it (to make it look a bit more futuristic) was all that would be needed for concept art.

Next up was adding a spaceship to the mix. Typically he’d be given a broad description of what the ship would look like but, more importantly, what the dimensions of the internal rooms would be so they could match with interior shots and sets.

He was told the ship needed to have a cockpit, bunk room and engine bay before being given the size specifications for each room. This gave him a scale for a 3D environment so he set about building the ship from scratch using VR and Gravity Sketch. It took him less than five minutes. He pointed out that the Oculus Touch controllers were handy in that they didn’t require him to flail around much so the risk of crashing into walls and the like was minimised.

Gravity Sketch VR design.

Waving his hands around like Tom Cruise in Minority Report... to build a spaceship from scratch.
After saving the 'sketch' he exported it as a widely-compatible OBJ file and imported it into Keyshot 8 which offers many textures and lighting options. He matched the light source to the MSI office picture and chose an anodised metal colour for paint. He then rendered the image using Keyshot which took about a minute using intensive CPU processing – it used to take 30 minutes according to Colie. He remarked that other renderers can make use of the GPU.

Save as an OBJ file.
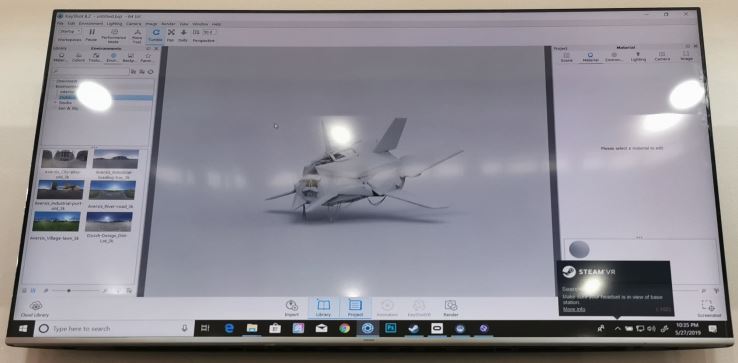
Import into Keyshot 8.
The spaceship was then imported into Photoshop and the blacks on the spaceship were matched to the blacks at the similar depth-level to the picture – which stopped it from standing out as an obvious ‘shop job.
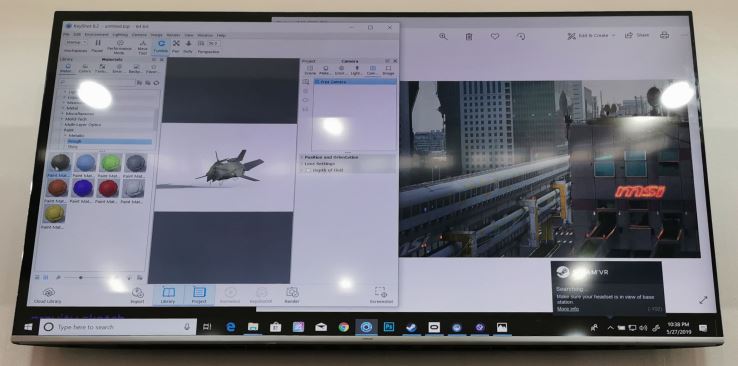
After rendering in Keyshot the resulting file is imported to Photoshop.
After importing, it was important to use Photoshop's Levels tool to match the blacks of the ship with the blacks at the corresponding depth of the background.
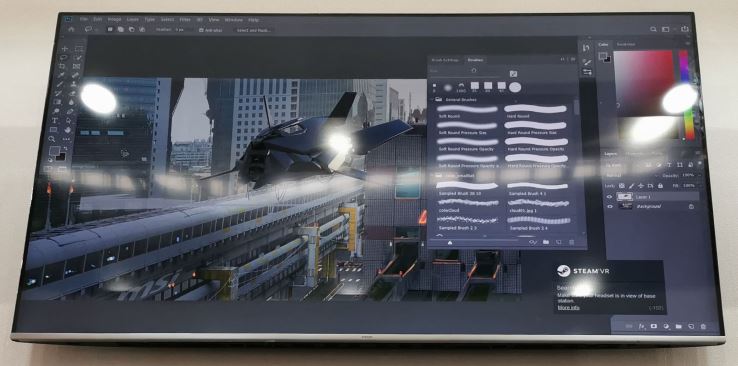
He then clipped the tail so that it appeared behind the building before giving it a final paint-over that included some heat-haze around the engines, panels on the ship’s body and some highlights.

The final concept art which uses a ship that's to made to scale and so subsequently can be used as plans for set building.
The result looks extraordinary considering the time it took to create them. Years of practice made everything look easy but the fact remains that what would have taken experts a very long time (potentially using very expensive equipment) was now available to all, at consumer pricepoints and is easier to create than ever.